iOS 动画笔记
大坑未填完,发布下博文降低罪恶感…
人生的意义就是不断地挖坑,并不断地去填补。
——猫冬
本文为《iOS Animations by Tutorials》笔记上篇,代码用 swift 3 编写。
动画属性
简单的动画
1 | @IBOutlet var heading: UILabel! |
上面这段代码的作用是把在屏幕左边的标题通过动画移动到相应位置。
这里使用了动画方法:animate(withDuration:delay:usingSpringWithDamping:initialSpringVelocity:options:animations:completion:)
- withDuration: 动画持续时间。
- delay: 动画开始前的延迟时间,值为0时动画效果立刻显示。
- options: 表现动画的一系列方式,如淡入淡出等,可以直接用[]表示无动画选项。
- animations: 代码块中提供你的动画效果,注意代码块中无参数和返回值。
- completion: 动画执行后要干什么。
位置和大小
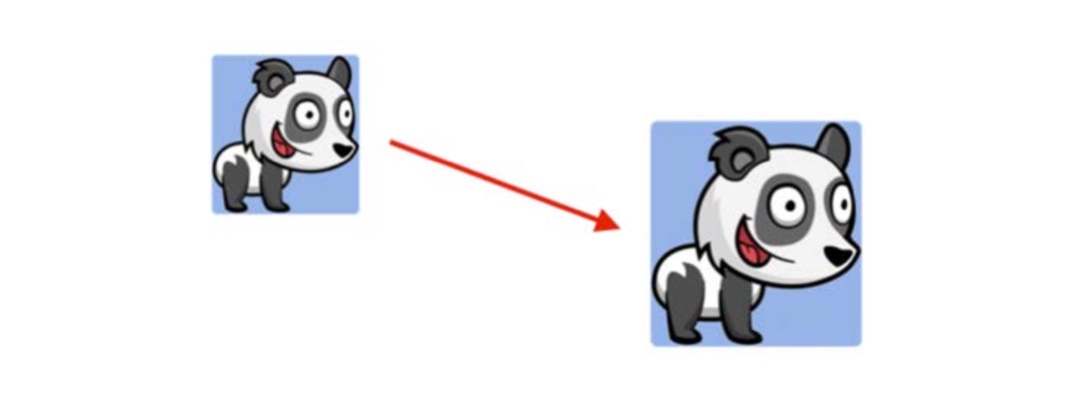
我们可以通过改变一个 view 的位置和 frame 来实现放大、收缩或者移动效果。
- frame: 该 view 在父view坐标系统中的位置和大小。
- bounds: 该 view 在本地坐标系统中的位置和大小。
- center: 想要移动 view 到一个新位置时改变该属性。
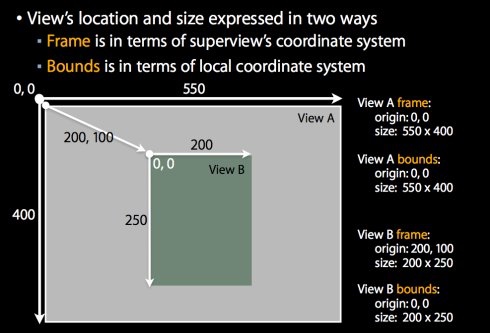
关于frame 和 bounds 的更详细的区别可以参考ios view的frame和bounds之区别(位置和大小)。
外观
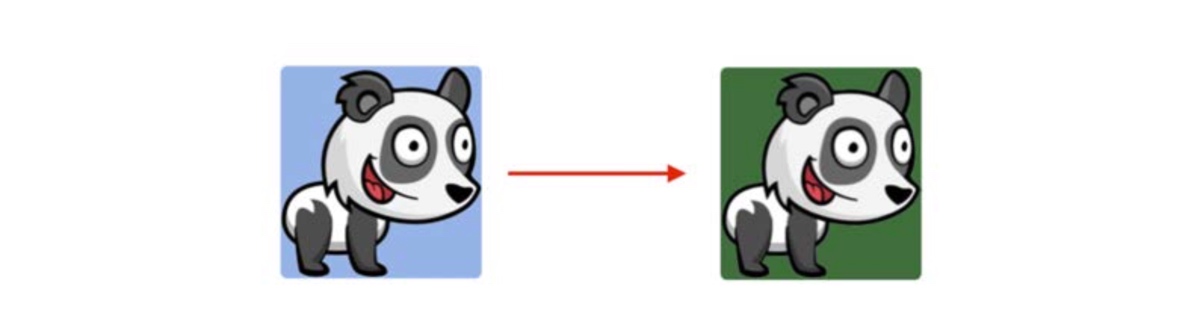
我们可以通过改变背景色或透明度来改变 view 的外观。
- backgroundColor: 改变背景颜色
- alpha: 改变该属性来创造淡入淡出效果
形变
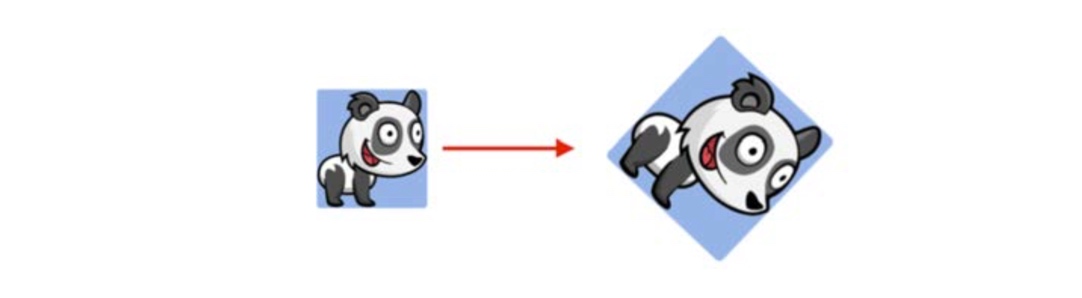
- transform: 在动画块中改变该属性可以去使 view 旋转、改变 view 大小或位置。
动画选项
options 能让你知道 UIKit 是怎么创建我们的动画的,下面是一系列声明在 UIViewAnimationOptions 集中的动画选项,可以以不同形式来结合,并在我们的动画中使用。
重复
- .repeat: 这选项能让你的动画循环起来。
- .autoreverse: 这选项只能和
.repeat放在一起使用,作用是重复播放动画,然后逆向播放动画。

1 | UIView.animate(withDuration: 0.5, delay: 0.4, |
动画缓动
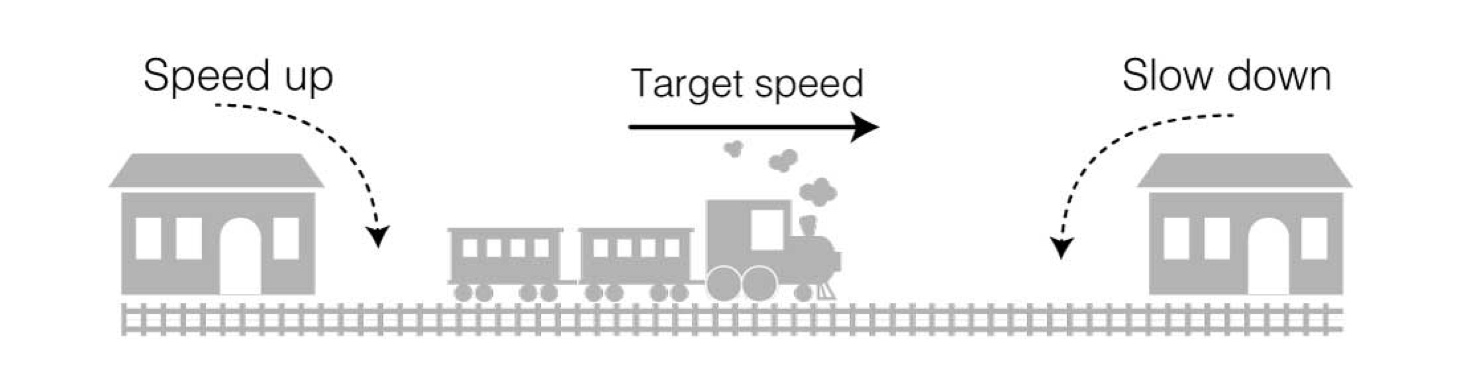
就像火车出站的时候会加速,到站时会减速一样,我们也可以给动画加上缓入缓出效果。
- .curveLinear: 没有加速也没有减速。
- .curveEaseIn: 在动画开始时加速。
- .curveEaseOut: 在动画结束时减速。
- .curveEaseInOut: 动画开始时加速,结束时减速。

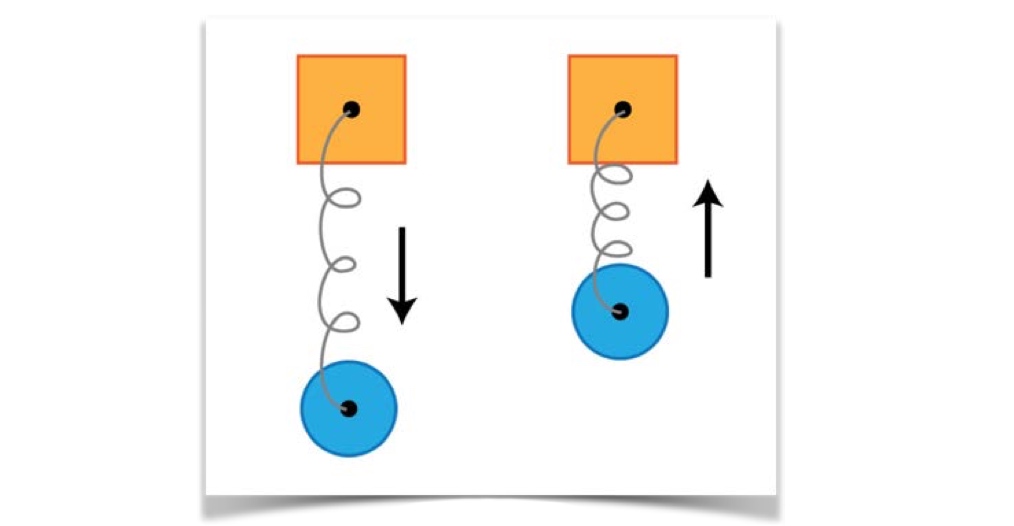
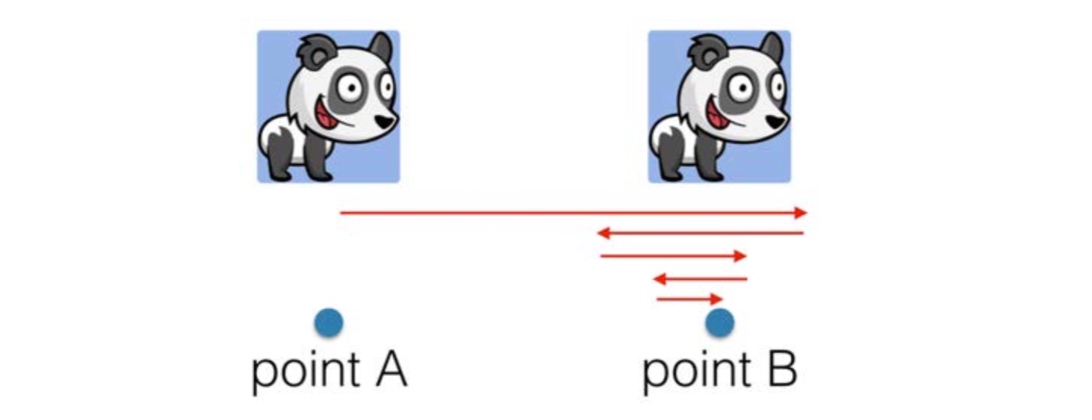
弹性
像弹簧一样,动画也能实现这种来回弹动,最终停止在 point B 的效果。
1 | override func viewWillAppear(_ animated: Bool) { |

这里用了新的动画方法:animate(withDuration:delay:usingSpringWithDamping:initialSpringVelocity:options:animations:completion:)
- usingSpringWithDamping: 控制阻尼系数,接受值在0.0和1.0之间,靠近0.0能创建一个有弹性的动画,靠近1.0能创建一个僵硬的效果。
- initialSpringVelocity: 控制动画的速率,表示在一秒中动画所走的距离占总距离的比率。例如,动画中的距离为200 points,我们想达到100 pt/s的速度,则用0.5做值。数值越大移动越快。
过渡
当你想通过动画来增加一个 view 或移除一个 view 的时候,你仍然可以使用前面提到的方法,这里将会告诉你如何使用过渡(transitions)来动画显示 view 中一系列的改变。
Transitions are predefined animations you can apply to views. These predefined animations don’t attempt to interpolate between the start and end states of your view. Instead, you’ll design the animations so that the various changes in state appear natural.
增加一个 view
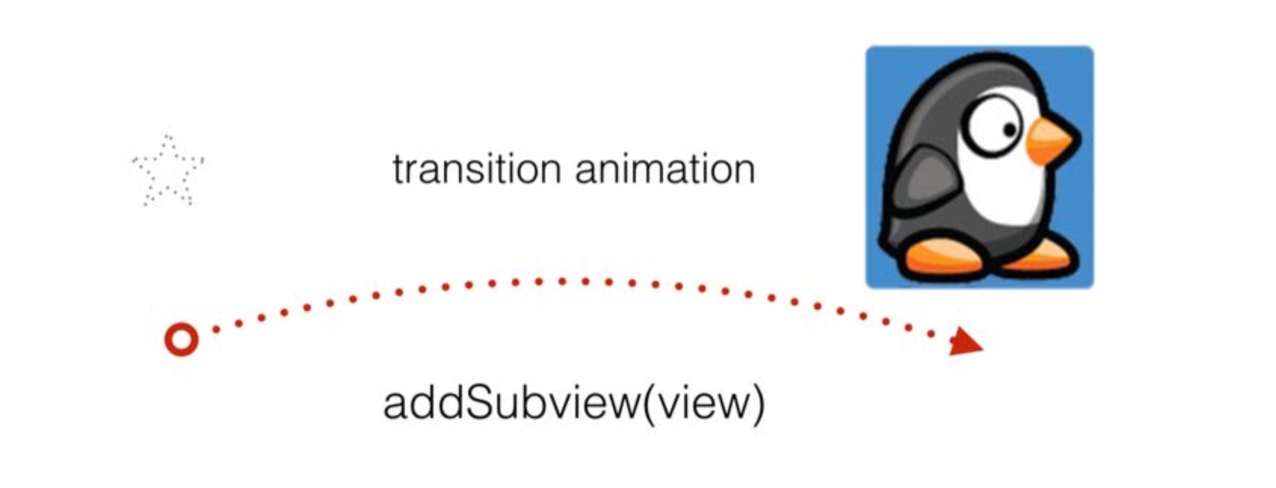
和前面一样,我们也是调用类似的方法,不同的是这次将会选择一个预先定义好的过渡效果并在 animation container view 中显示动画。
过渡通过 container view 来显示,在动画播放的时候其他新的 view 将会作为子view加入其中。
1 | var animationContainerView: UIView! |
上面的代码可以看到,过渡的方法比之前看过的方法多了一个参数「view」,就是指要把过渡效果加入其中的 container view。另外未见过的还有.transitionFlipFromBottom,这也是定义好的过渡选项,显示的是一个底部翻转的效果,下面还列出所有的过渡动画选项。
1 | .transitionFlipFromLeft |
移除 view
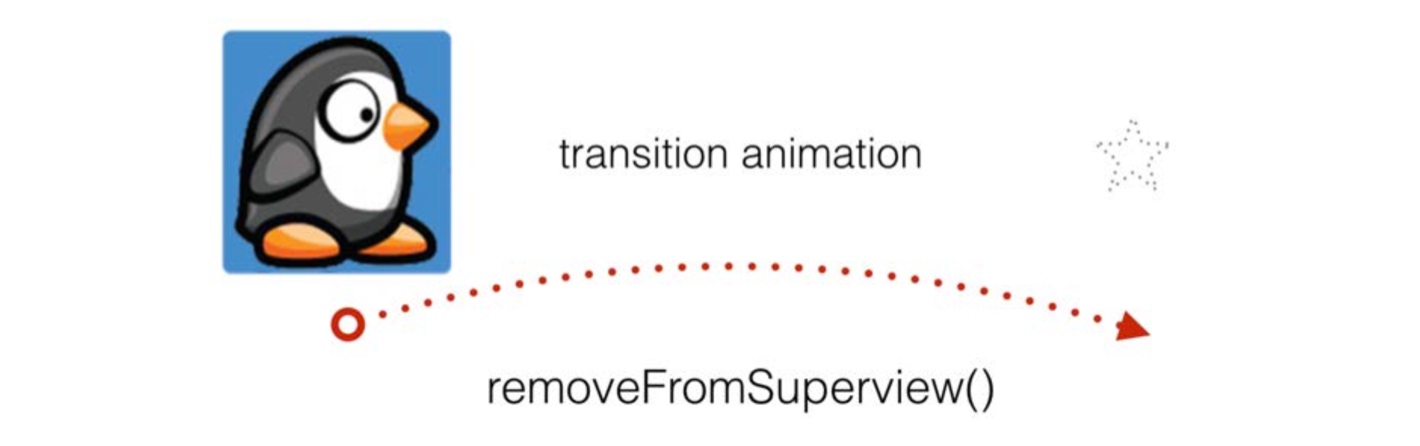
代码和增加 view 类似,不过这次调用的是removeFromSuperview()方法。
1 | UIView.transition(with: animationContainerView, duration: 0.33, |
隐藏/显示 view
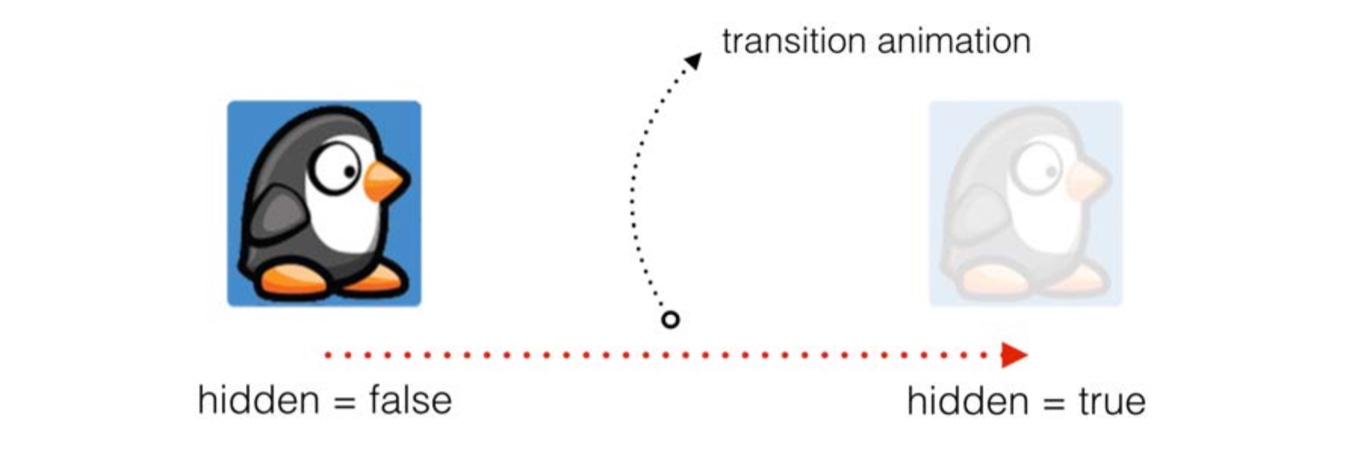
到目前,我们只知道过渡效果要区分 view 的层次,这也是为什么我们需要一个 container view 的原因。对于隐藏或显示一个 view 的时候,我们可以通过用要隐藏或显示的 view 来当做动画容器(animation container)。
1 | // 通过过渡隐藏 newView, |
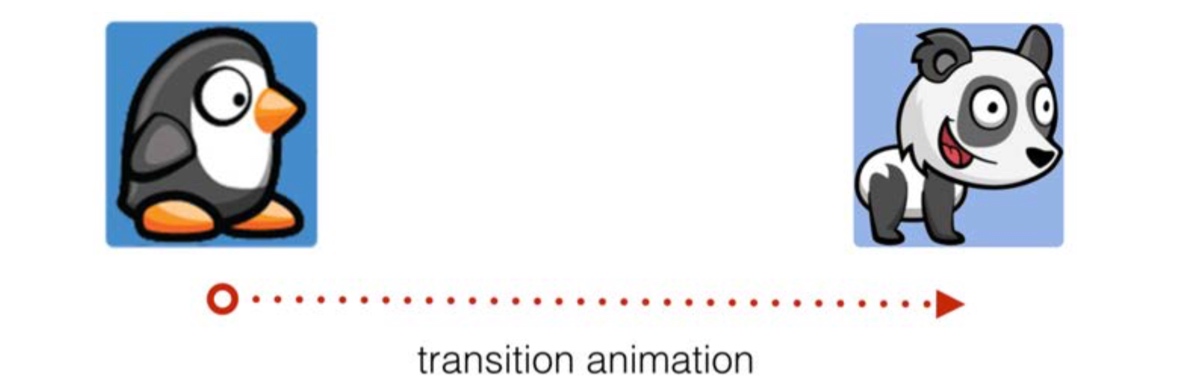
用一个 view 来取代另一个 view
1 | // 从 oldView 变为 newView |
更酷的动画
- Crossfade animation: 淡入淡出动画,把一张图片与另一张图片混合的动画效果。
- Cube transition animation: 立方体过渡动画,创建伪 3D 的过渡效果。
- Fade and bounce transition: 淡入淡出和反弹过渡,与简单动画的结合有一些不同。
Crossfade animation
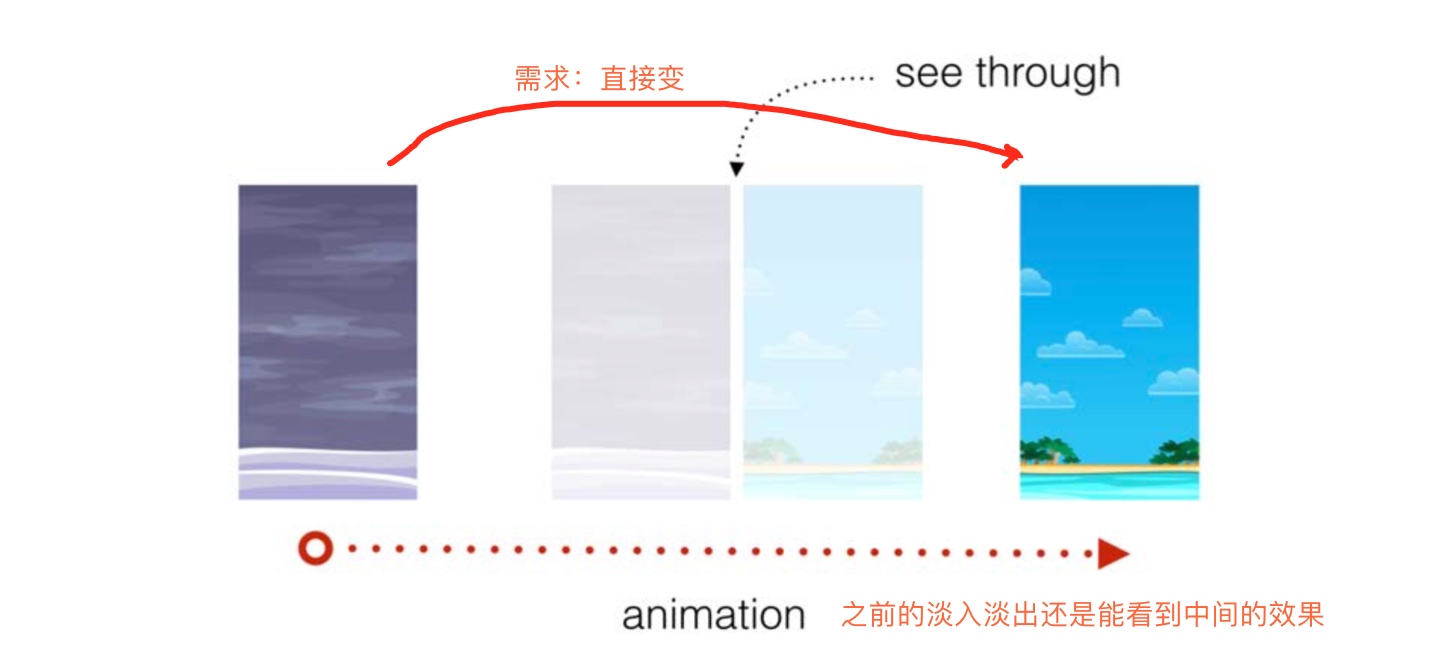
如果需要把一张图片直接变成另外一张图片,之前的淡入淡出就不太好用了,因为能看到中间的淡入淡出效果。
楼主的坑已经不想填了,看到这的朋友可以参考:
iOS 核心动画高级技巧 :iOS Core Animation: Advanced Techniques 的译本,由 OC 编写
 wechat
 alipay